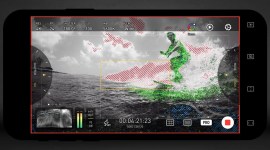
How to Use OBS Studio for Streaming and Video Conferencing
With OBS Studio, you can use any digital camera to make video calls and start streaming with just a computer, a camera, and a video capture device.
Streaming and video conferencing are becoming more useful every day thanks to social distancing, a fact that makes Open Broadcaster Software (OBS) worth looking into. OBS Studio can cover some of the gaps that video conferencing platforms don’t. Even better, OBS Studio makes it easy and affordable to start streaming, a creative pursuit that many find fulfilling as the days spent indoors continue to limit our interactions with the world.
While there’s other software similar to OBS Studio — i.e., XSplit and Stream Labs OBS — OBS Studio is a free, open-source software. OBS Studio doesn’t cost anything to download or use, and while the software’s UI may look complicated, setting up a basic stream is easy. What’s more, OBS Studio can help connect any digital camera with a video output to your video conferencing platform of choice. The software works on Windows, macOS, and Linux, making it one of the most versatile software of its kind.
Setting up a Webcam in OBS Studio

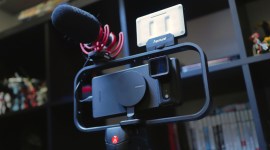
While it’s possible to use any digital camera with a video output port on OBS, Canon cameras can be used as a webcam, thanks to the EOS Webcam Utility Beta software. In this case, I’m using Canon’s M50 mirrorless camera.
There are a few ways to set up a camera on OBS Studio, the easiest of which merely involves connecting a webcam to the computer via USB.
- Plug the webcam into the computer.
- Head to OBS Studio and click the + button at the bottom of the Sources box.
- Once there, select the option called Video Capture Device.
- A new dialog box will open, and the webcam should appear as a video source under Device.
It’s possible to adjust a few settings in the properties menu, but it’s unnecessary — the camera should work. To open up the Properties menu again on any source, double-click on the video source listed in the Sources box, or highlight your selection and hit the gear icon.
The video from the webcam should appear on the Preview window in OBS Studio, and you can change where it’s displayed on the screen, as well as the dimensions of the webcam. Simply highlight the webcam in the Sources box, and click on the red lines on the edge of the webcam to change its position or dimensions.
It’s not very complicated, especially once you get used to OBS Studio. Setting up a camera is only the beginning if you’re planning to stream or video conference while simultaneously sharing your screen and camera, but we’ll get to that further below. For those that don’t have a webcam, it’s possible to use a digital camera as a video source, but it may require additional equipment.
Setting up a Digital Camera in OBS Studio
Recently, Canon and other camera manufacturers have released webcam software, making it possible to use a digital camera as a webcam. Canon’s EOS Webcam Utility Beta works on Zoom, Google Hangouts, and OBS Studio, and it’s compatible with Windows and macOS computers. The software works with a majority of Canon cameras, and it doesn’t require the use of an HDMI cable. Instead, cameras can connect to the computer via a USB cable, which should come included with the camera.
While Canon was one of the first to debut this kind of software, other manufacturers offer comparable software for their cameras. However, if you’re out of luck, there’s another way to use a digital camera as a webcam. Granted, it’s not a cheap solution, as you’ll need to purchase some equipment.
Video Capture Device
Before you get started, make sure your camera has a video output port. Most modern cameras have video output ports, even at lower price points. If your camera doesn’t have an HDMI, Micro HDMI, USB-C, or another video output port, you’re really out of luck. You’ll have to look online for an affordable camera with a video output source.
The next piece of equipment you’ll need is a video capture device. We’ve covered this before if you want a more in-depth look, but video capture devices, essentially, make it possible to transmit the video output of the source to your computer and OBS Studio. Though mostly used by gamers and streamers, video capture devices are useful for streaming video from a camera.
I have Elgato’s HD60 PRO capture card installed directly on my motherboard, but Elgato makes other video capture devices that are portable, making them perfect for laptop owners. You’ll need at least one HDMI or video cable to make a capture card work. No matter what camera you have, you need a cable that fits your camera’s port on one end and the HDMI input of the video capture device on the other end. For example, if your camera has a Micro HDMI port, purchase a Micro HDMI to HDMI cable. You’ll also need to install your video capture devices’ software so that OBS Studio can detect the source.
Video Capture Device Setup

Instead of using Canon’s webcam software, I used the capture device to receive the camera’s video output. The camera outputs whatever is on the viewfinder, such as the 3×3 grid, face tracking, recording time, and battery. You can turn off these settings in the camera menu for a cleaner look.
As an example, using Elgato’s HD60 S, connect one side of the cable to the camera’s video output port and the other side to the device’s HDMI input port. Also, connect the USB cable from the device to the computer, which is what transmits the video source to the computer’s software. Alternatively, you only need to connect the source to the HDMI input port on a video capture card installed on a motherboard. Below is how to view the camera’s video output in OBS.
- Create a new source in OBS Studio by clicking the + in the Sources box.
- Select Video Capture Device.
- The name of the capture device should appear in the device selection dropdown within the properties menu.
- Click Ok to exit out.
- The camera feed should appear on the OBS Studio preview screen.
Admittedly, setting up a digital camera with OBS is not the most affordable solution. Still, a digital camera with the right lens and auto-focusing tech can track your face perfectly while providing that blur effect to the background, making you pop from the screen. Modern webcams are good, but a decent digital camera blows even the best webcams out of the water.
Using OBS Studio for Video Conferencing
While OBS Studio is a software primarily used by streamers, it can double as a video conferencing tool that will let you control what’s on screen. However, you’ll have to download the latest version of OBS Studio and a third-party plug-in known as “VirtualCam” to get things started. If you want to share your screen while a smaller window shows off your camera, it’s possible. And, if you don’t have a webcam, there’s a way to plug in your digital camera to OBS Studio to make it a video input.
VirtualCam

Though OBS Studio doesn’t natively support VirtualCam, installing the software is painless. The Virtual Cam plug-in that I used is only for Windows computers, but there’s a macOS version. This tutorial is only for VirtualCam on Windows.
If you’ve already set up a camera, you can start using VirtualCam right away.
- Select the Tools dropdown menu from the top bar and select VirtualCam.
- In the menu box, head to the Target Camera setting and select OBS-Camera.
- Click the Start button on the menu box, then exit out.
- Your OBS Studio setup should now be available on video conferencing platforms as a camera input called OBS-Camera.
This method displays whatever is on OBS Studio’s preview window, but it’s possible to select a single source.

Once you’ve right-clicked on the source, click “Filters” and select the “+” button under “Effects.” At this point, you can select “VirtualCam,” then click “Start.”
Here’s how to select a single source for VirtualCam instead.
- In the Sources box on OBS Studio, right-click on the source you wish to output to Zoom or similar software.
- Click on Filters.
- Select the + button under Effects on the right side of the menu box.
- Select VirtualCam and click on Start.
Now, only that source will output to the video conferencing software of your choice when selecting OBS-Camera as the video input. This is useful when you only want to share your webcam, for example, and nothing else.

When selecting OBS-Camera as the video output, only that source will output to your video conferencing software.
Using OBS Studio on Zoom Calls with VirtualCam
With the camera set up, you should be good to go. Make sure your preview screen is displaying the camera source and other sources you have selected. If VirtualCam is activated from the “Tools” menu, anything displayed on the preview windows will appear on the video conferencing platform.
Here’s how to output video from OBS Studio to Zoom:
- Start or join a call.
- Click on the upward-facing arrow left of the camera input.
- Select OBS-Camera from the menu.
- Whatever is displayed on the OBS Studio preview window should now appear on Zoom.

If you’re screen sharing on OBS Studio, you’ll get the Inception effect in Zoom. On OBS, you can select to share a specific program instead of the whole screen.
Using this setup to stream your setup to Zoom is easy, and I had no issues with it. Unfortunately, Google Hangouts would not cooperate, which is disappointing. No matter what I did, “OBS-Camera” never appeared as a video input source. There may be a problem with Hangouts or OBS Studio that’s causing the issue, but the documentation on the OBS Studio forums says that Hangouts should work. Zoom worked fine for me, and OBS Studio with VirtualCam should also work with Skype. Neither Google Hangouts nor Meet worked on my computer, but yours might be different. You should try it on your system to see if it works.
How to Set up a Basic Stream
Streaming from OBS Studio only adds a few more steps to the process above, and you should already have all the necessary components.
When streaming, the content takes priority. For example, when streaming a video game, the game takes up a majority of the screen, and a smaller corner of the screen displays your camera feed. Here’s how to achieve this basic setup:
- Click the + in the Sources box.
- Select Game Capture.
- You’ll have several options in regards to input, but I’ve found that it’s best to select Capture Specific Window on the Mode dropdown menu.
- Directly below the Mode dropdown is another dropdown named Window. Click on that and the game or application that you want to display should appear.
- Select what you want to display and click Ok.

From the “Mode” dropdown menu, select “Capture Specific Window,” then click “Window” and your game will appear, then click “Ok.”
With the game or application selected, it’s time to set up the camera. If you already have the camera set up as a source, it’s only a matter of positioning. Select the camera in the Source box, which will highlight where it’s displayed on the screen. You can click anywhere within the box to move it around the screen, and clicking on the edges adjusts the size.

Once your camera is set up, you can move the Overwatch to where you want it on the screen.
Twitch streamers have flashy transitions, overlays, and icons that appear on-screen, but the setup is more or less the same. Now, all you have to do is set up an account on a streaming platform.
Twitch Is Your Best Bet
Facebook and YouTube have streaming platforms, but streaming is Twitch’s bread and butter, making it the best platform for streaming. Up until recently, Microsoft’s Mixer was seen as a potential threat to the purple streaming giant, but Microsoft has shut down Mixer and partnered with Facebook Gaming. If you’re just starting, it’s worth trying Twitch for two reasons — audience and variety.
Making an account on Twitch is free, and you may make some money streaming if you can attract an audience — audience tips and ad revenue are how streamers make most of their money. While some of the biggest streamers on Twitch tend to stream video games, there are also musicians, artists, workout instructors, and people who just like to chat with their audience.
Don’t think you have to play video games to stream. You’ll be surprised as to what a Twitch audience will watch. If you want to stream tutorials on video or photo editing, animation, or music production, there’s an audience out there — you just have to find them.
Making a Twitch Account
Head to Twitch.com to create an account, click on the Profile icon on the top right corner, and click on the Creator Dashboard option in the dropdown menu. You’ll be prompted to read some articles detailing hardware recommendations, setting up a stream, community guidelines, and much more — the information is invaluable, so take your time.
Streaming from OBS Studio to Twitch
Below the Creator Dashboard homepage, there’s a link that leads to your stream key. Copy the stream key, and head to OBS Studio.

After copying your stream key, go to OBS Studio.
Open the settings menu on OBS Studio, click on the Stream tab, and then paste your stream key.

In the “Settings” menu, paste your stream key.
Now, you can stream directly to Twitch. To start streaming, click Start Streaming on the bottom right corner of the OBS Studio screen, which should stream your OBS Studio preview window to Twitch.
A bare bones stream is functional, though it lacks personality and flair. Thankfully, there are a few tricks you can use to spice up your stream.
Setting up Overlays, Transitions, and Alerts
To get the most of your stream, you’ll want to have an overlay, creative transitions, and different scenes. Having two monitors is almost necessary, though. Otherwise, you’ll have to switch back to OBS Studio whenever you need to make a change to your stream. For an optimal streaming setup, the program or game that’s being streamed should be on one screen, while OBS Studio is open on the other screen.
Overlays
One of the most significant ways to improve a stream’s aesthetic is by implementing an overlay. If you’re a talented graphic designer, this is the time to use your skills, but there are other solutions for those that aren’t artistically gifted. There are overlay templates online that are relatively affordable. Overlay templates include waiting screens that display the time until the stream begins, webcam frames, icons that trigger when donations are made, and much more. It’s best to find a graphic designer that can nail your stream’s look and branding for custom overlays.
Transitions
Transitions are another useful feature, and they work best with a dual monitor setup. When streaming, you’ll want to set up different scenes within OBS Studio. You could have an intro scene that displays a timer until the stream starts, one scene for the actual stream, and maybe one more to end the stream. Each scene can be set up to show or not show different aspects of your stream, and they’re a useful production feature. You can select a different scene from the one you’re currently on and transition when you’re ready. For example, you can display the intro scene and transition to the streaming scene by selecting the scene and hitting the “Transition” button when you’re ready.
Here’s how to transition:
- Create a few scenes by clicking the + button in the Scenes box.
- Add a source or sources to the scenes to set it up.
- Now that you have multiple scenes, switch to Studio Mode by clicking the Studio Mode button, which displays two screens side by side.
- The screen on the left is the preview, and the screen on the right is what is being shown on stream.
- Select a new scene in the Scenes box, then hit the transition button between both screens.
- Whatever was on the left screen should now appear on the right screen, and vice versa.
- You can add other transitions, such as Cut or Fade to Black by clicking the + next to Quick Transitions.
Make sure to select Duplicate Scene by clicking the gear icon next to the Transitions button, which allows you to edit the same scene without making live changes, until you make a transition. This way, you can edit a scene however you like, then show off the final scene when it’s ready.


After you make a transition, only the screen on the right is what’s shown on stream. You can prepare new scenes on the left screen and transition when you’re ready.
Alerts
Those overlay packages found online also come with icons that can be activated when certain things happen. For example, icons can trigger every time there are new donations, followers, or subscribers. Setting up these alerts on Twitch is a bit more complicated. Thankfully, Gaming Careers has an amazing, in-depth tutorial video on YouTube that covers how to set up Twitch alerts via Stream Labs OBS.
Other Features
The amount of features found in OBS is much larger than what’s in this article, so experimentation is key if you want to get the most out of the software. With the “Filters” feature, for example, you can apply a chroma key filter to your webcam feed that, when used with a green screen, will help you blend in with the content you’re streaming. You can also tweak the color correction or apply a LUT to your webcam or camera, which is another way to customize your stream and how you appear.
Before you hit the streaming button on OBS, spend some time with the software and get comfortable. You’ll be surprised as to how much you can customize your stream, and those same features apply to video calls.
OBS Studio Is a Free Entry-Level Software with Plenty of Features
There are tons of tips and tricks that you can use to improve your stream or video call, but the tips above should help you get started. While professional streamers have thousands of dollars invested in equipment, you don’t need much to start streaming. And, even though it’s somewhat complicated to stream from OBS Studio to Zoom, the rise in quality is undeniable when paired with a decent digital camera.
Whether you want to start streaming or improve your video calls, OBS Studio is a free product with many helpful features. The user interface may not be the most welcoming, but it’s worth spending some time with the software to unlock its full potential.
If you’re interested in streaming, these resources are for you:
- Streaming on OBS with the Blackmagic Web Presenter
- The Ins and Outs of Streaming on YouTube Live
- The Most Practical Livestreaming Microphones on the Market
- How to Loop Video for Live Streams Using OBS Studio
Cover image via Parilov.